Guide on getting started
TLDR; Install application, create and configure securities and accounts, reporting, taxonomies and general data.
Installing the application
Portfolio Performance is primarily targeted at a German speaking audience. Therefore, the application’s website is in German. If you aren’t fluent in German, you can use Google translate to understand what is written in the page.
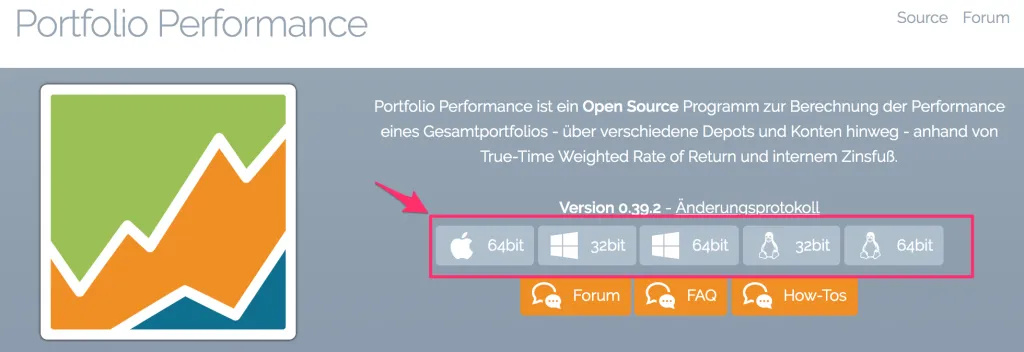
The image below shows where you need to click in order to download the application for your operating system (as of June 2019).
Changing the language
Note: When you install the application its language is automatically configured to your operating system language. If your operating system’s language is “English” your application will be in “English”.
The application is available in English, German, Dutch and Spanish.
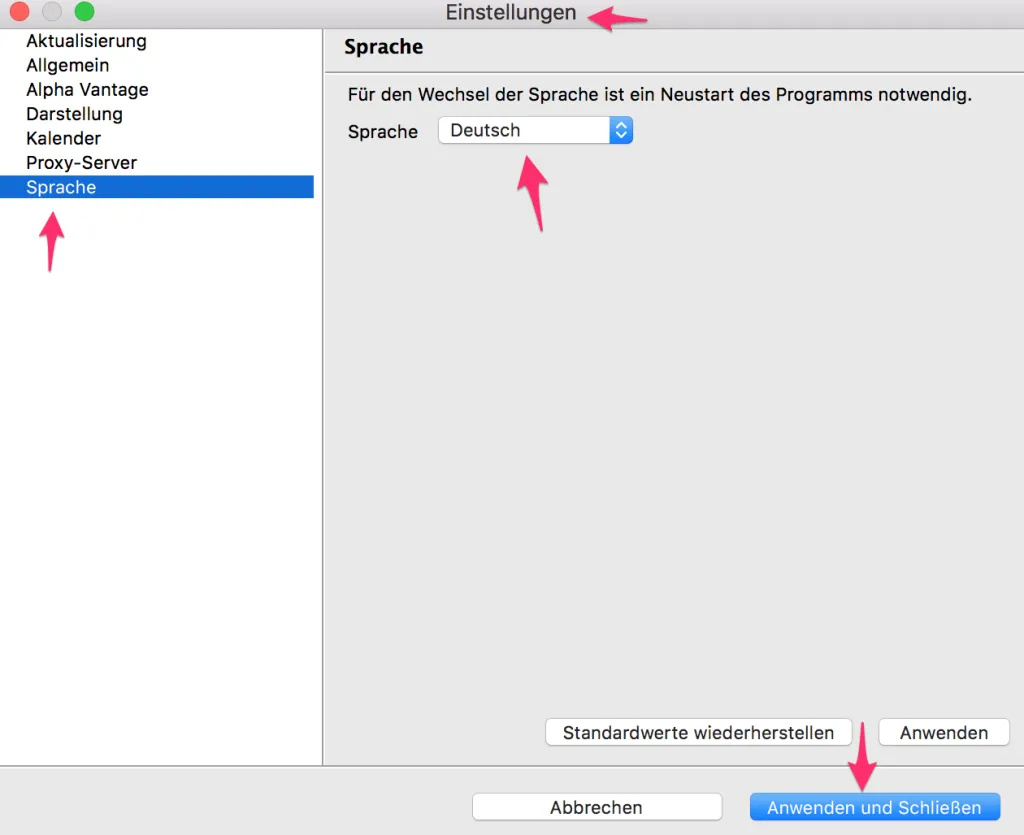
In case the application is in German you can change the language in the preferences of the application. In Mac OS:
- go through the menus “Portfolio Performance > Einstellungen > Sprache”.
- select “English” in the “Sprache” dropdown
- click “Anwenden und Schließen”
- Restart the application
Landing page
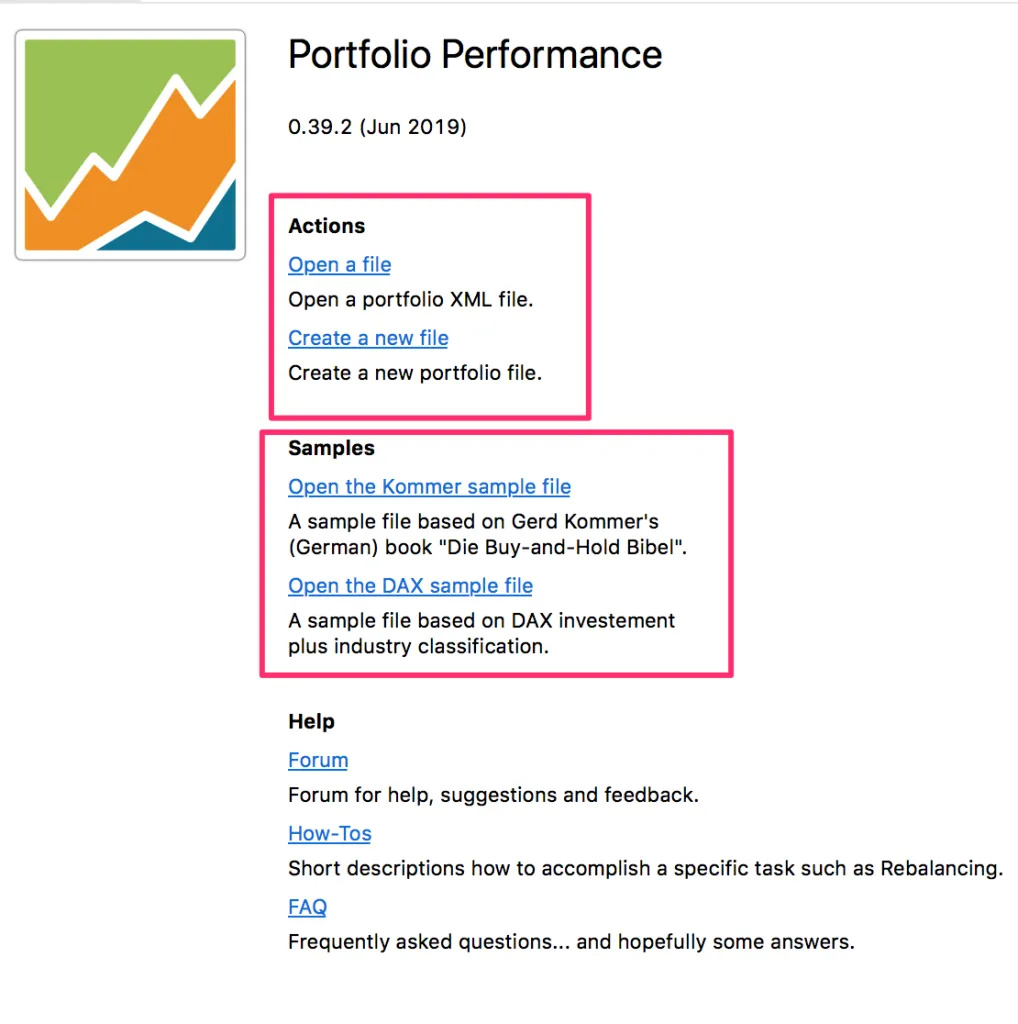
The application works by storing all your portfolio information in a XML file stored on your computer. From the landing page you can create a new file or open an existing one.
The application also has a few sample files you can use to look at example portfolios so you can see the features of the application in action. The rest of this tutorial uses the kommer sample files already created in the examples - don’t Create a new file as shown below.
Create a new file
Note: Portfolio contains at least two accounts, Deposit account with money and Securities account with shares (see Accounts for details).
From the Landing page click the Create a new file link or use File, New:
- Choose the base currency
- Create securities and reference accounts
eg Securities Account: Broker Securities, Reference Account: Broker FundsThis tutorial uses manual data entry but another tutorial explains how to Import CSV Files to Create Portfolio.
Main sections of the application
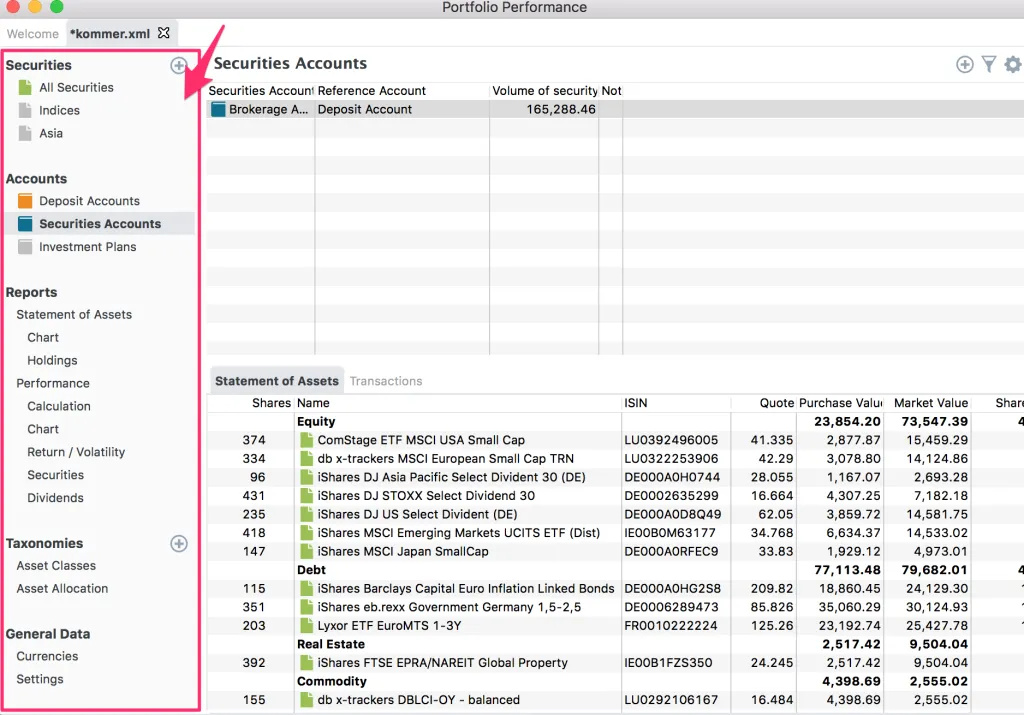
The application has 5 main sections:
- Securities – In this section you specify all securities that you intend to create transactions on.
- Accounts – In this section you register your transactions in your brokerage accounts (e.g. deposits, withdrawals, buy, sell, dividend).
- Reports – In this section you can see graphs about your portfolio and how it is performing according to several metrics
- Taxonomies – In this section you can see how your portfolio is allocated across asset classes. You can also specify your target asset allocation.
- General Data – In this section you can see the evolution of currency exchange rates and can also change the details of the where ETF information is fetched from.
Securities
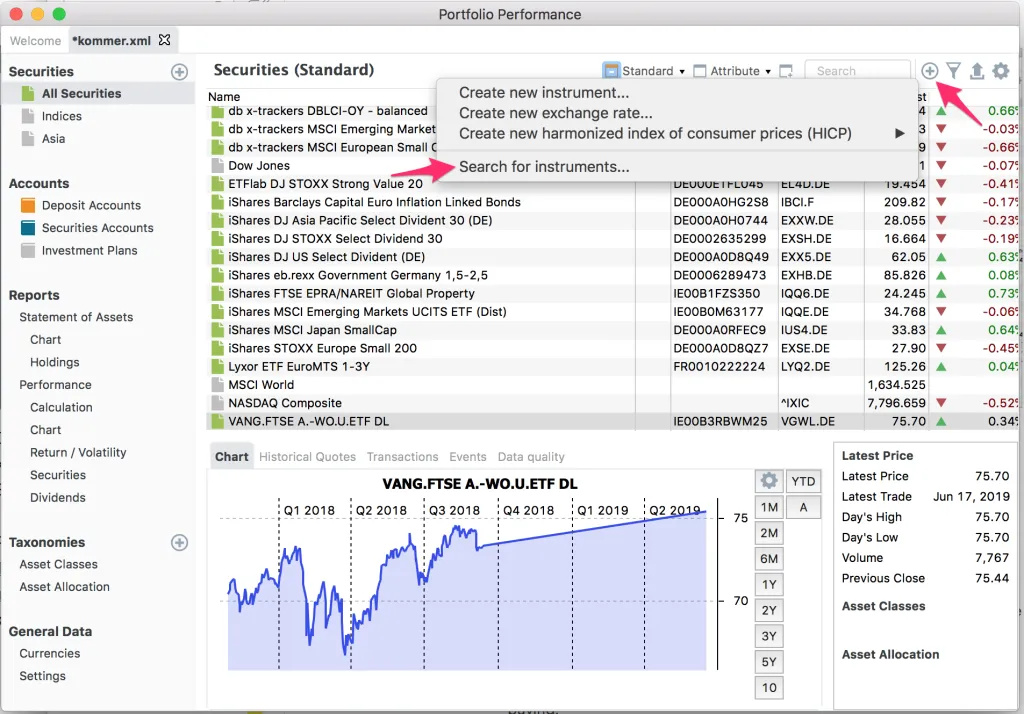
In the “All Securities” tab is where you add your securities, e.g. ETFs. Follow these steps to add an ETF:
- click on the right side “+” sign and then click on “search for instruments..”.
- type the ticker symbol for the ETF/exchange you are using and click on “search”. You can find the ticker symbol per exchange in the listings page of justETF. It is better to search by ticker symbol than by ISIN because this way the application will automatically pull the historical prices for the ETF you are tracking buying – ETFs have different prices depending on where they are listed.
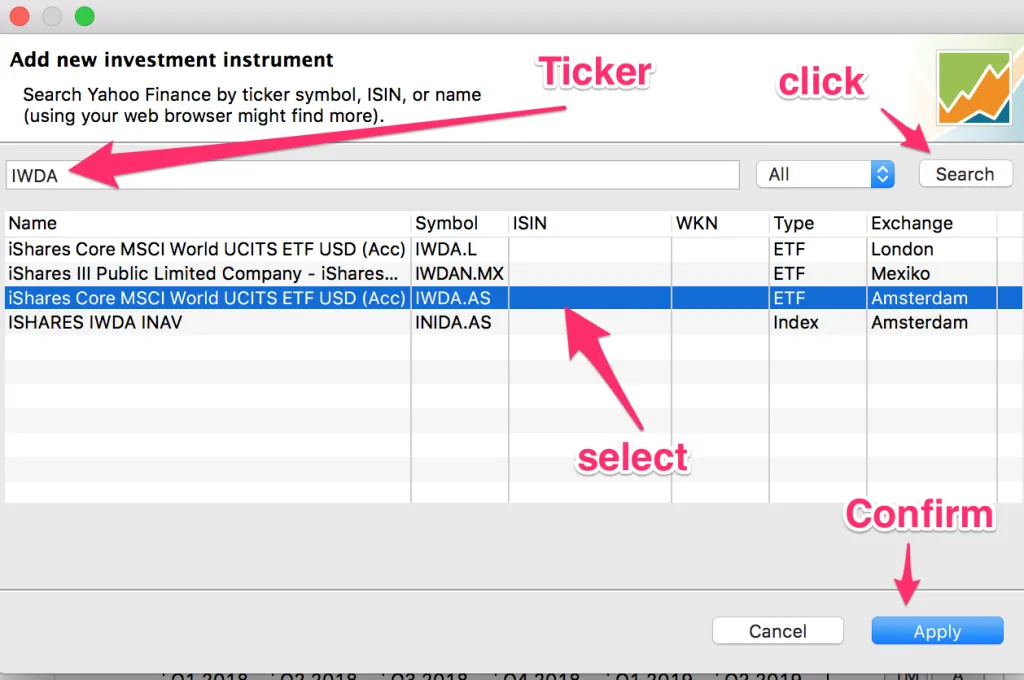
- select the ETF you are looking for and click on “Apply”. Multiple exchanges might have the same ticker symbol. You will have to select the one that applies to you.
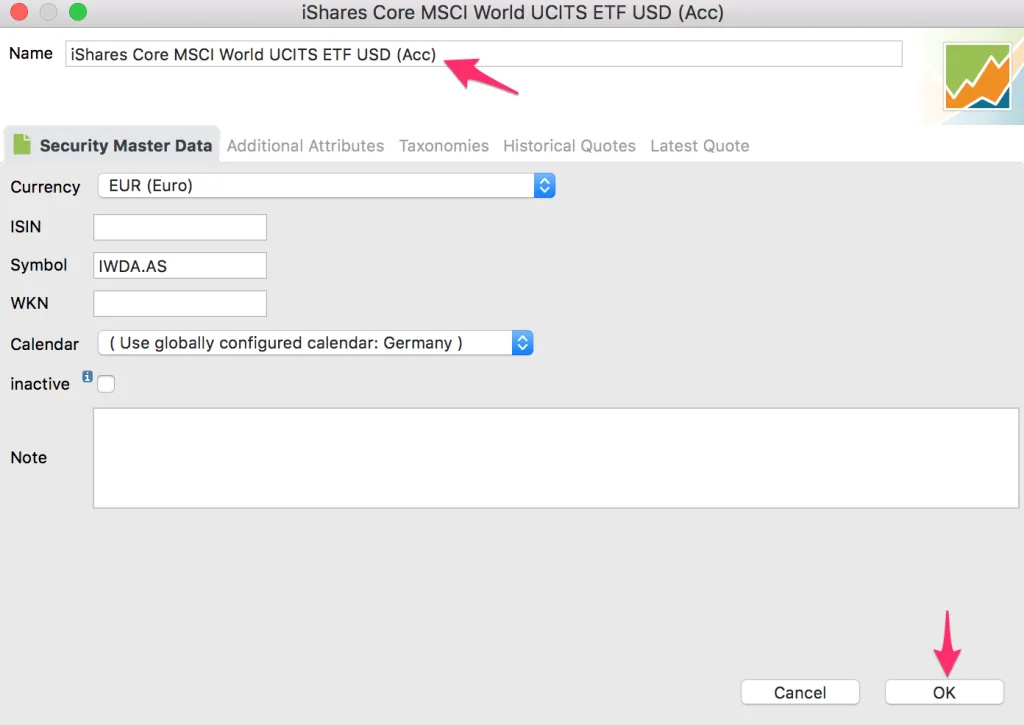
- confirm if you want to change the name of the ETF and then click “OK”
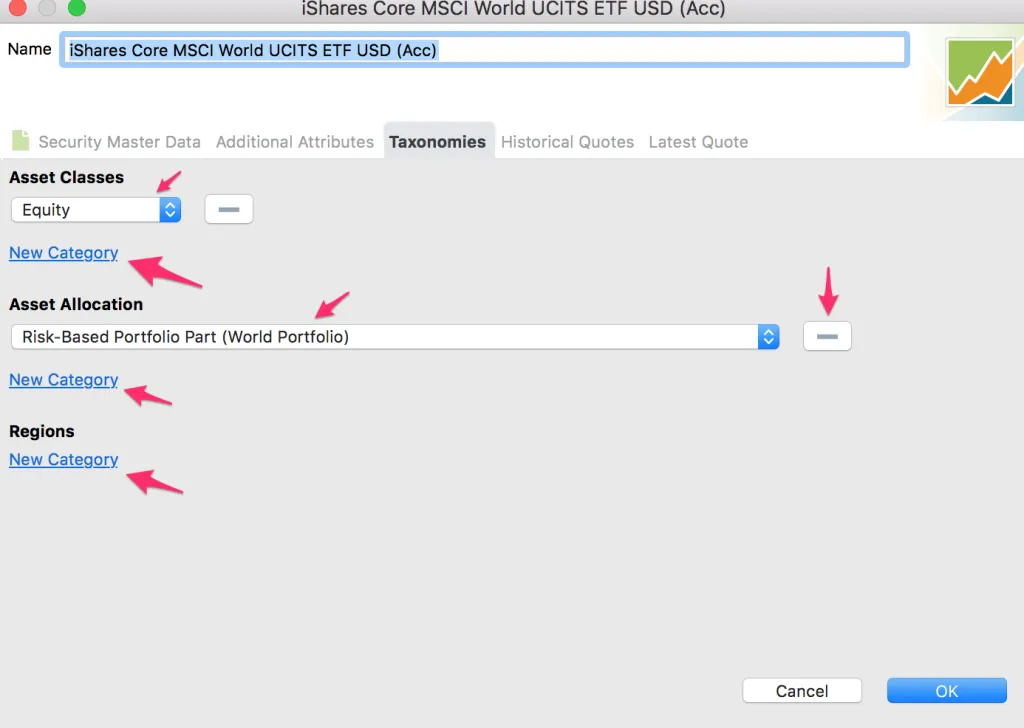
- optional: categorize the security. You can categorize a security according to its asset class (e.g. Equity, Debt) or its Asset Allocation (e.g. Risk Free Portfolio Part, Risk Based Portfolio Part) or Region. You can do that in the Taxonomies tab. This categorization will be useful when viewing charts.
Accounts
Portfolio Performance has a concept of Deposit Accounts and Securities Accounts. Deposit Accounts are where “money” is deposited to/withdrawn from, as well as where dividends are credited. A Securities Account is where you hold the different shares.
Some brokers will only buy securities with money in accounts they hold, while distributions may be paid into bank accounts. Accounts are also selected from an alphabetically sorted dropdown list.
You will have to create a Deposit Account(s) and a Security Account(s).
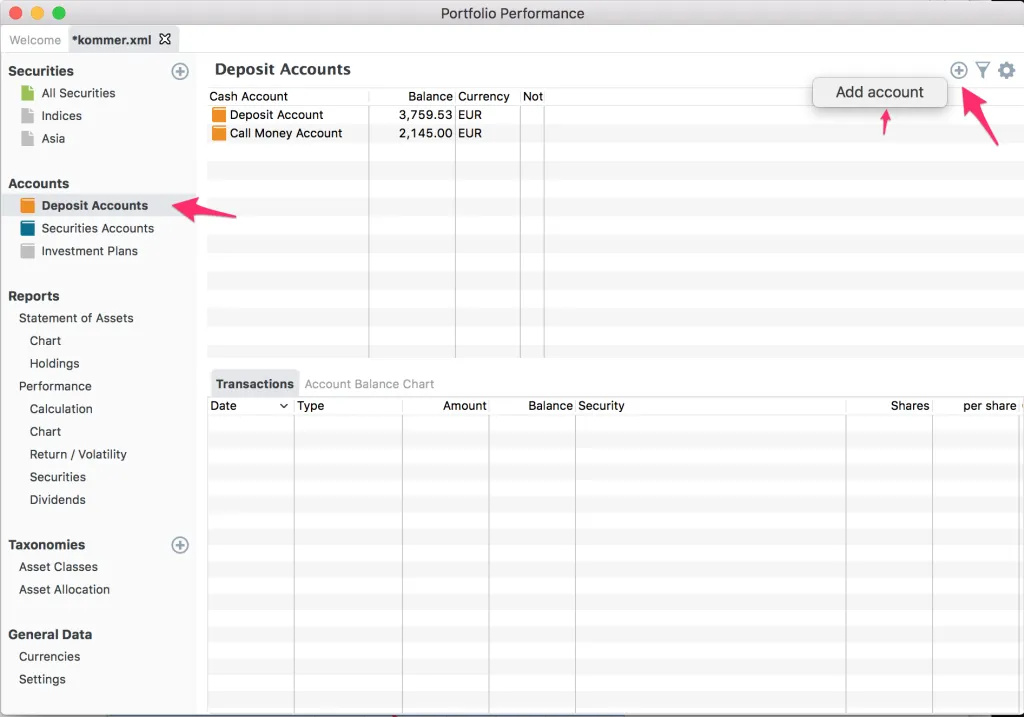
Creating a deposit account:
- Click on the the “Deposit Accounts” tab
- Click on the “+” sign on the top right corner
- Select “Add account”
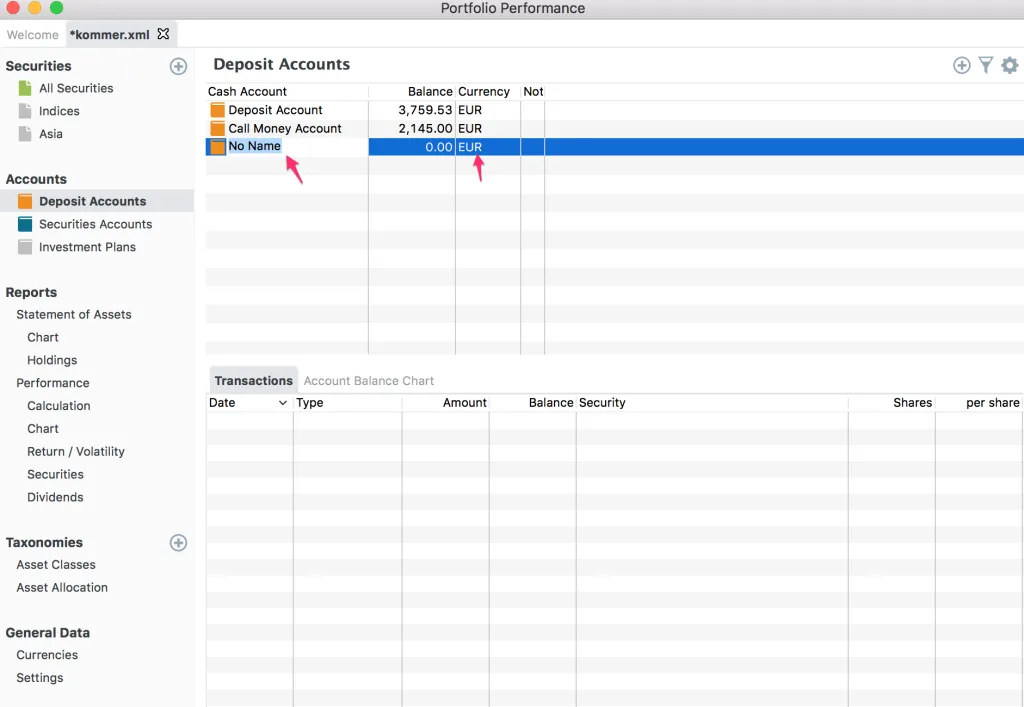
- Change the name of the new Account from “No Name” to your account name (e.g. DeGiro). You may also change the currency of the account.
Creating a securities account:
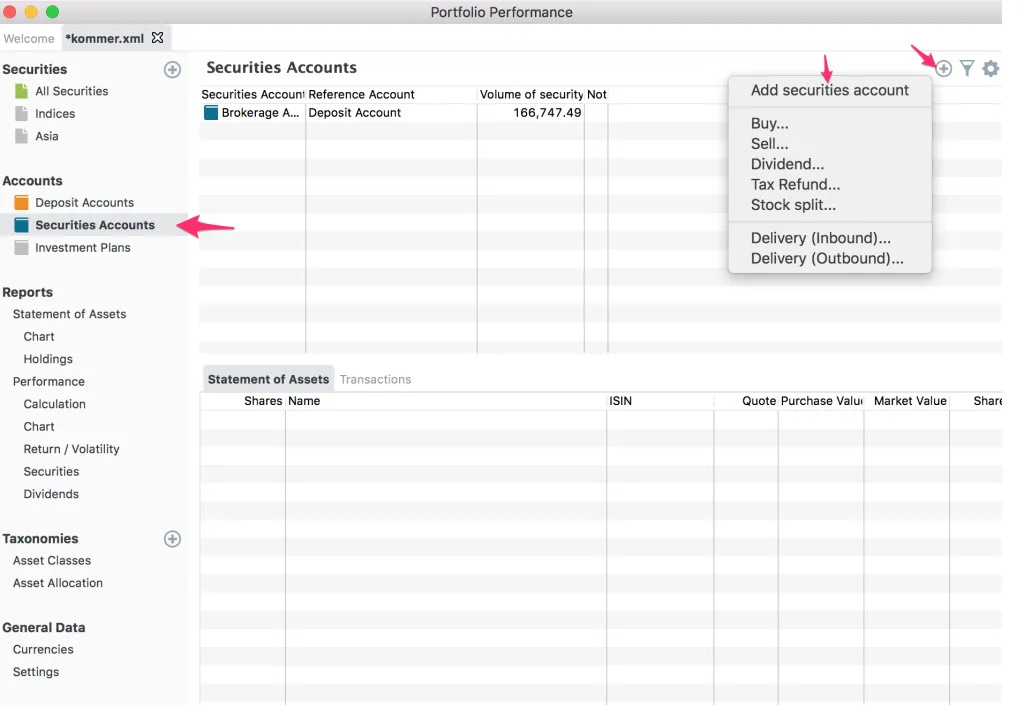
- Click on the “Securities Accounts” tab
- Click on the “+” sign on the top right corner
- Click on “Add securities account”
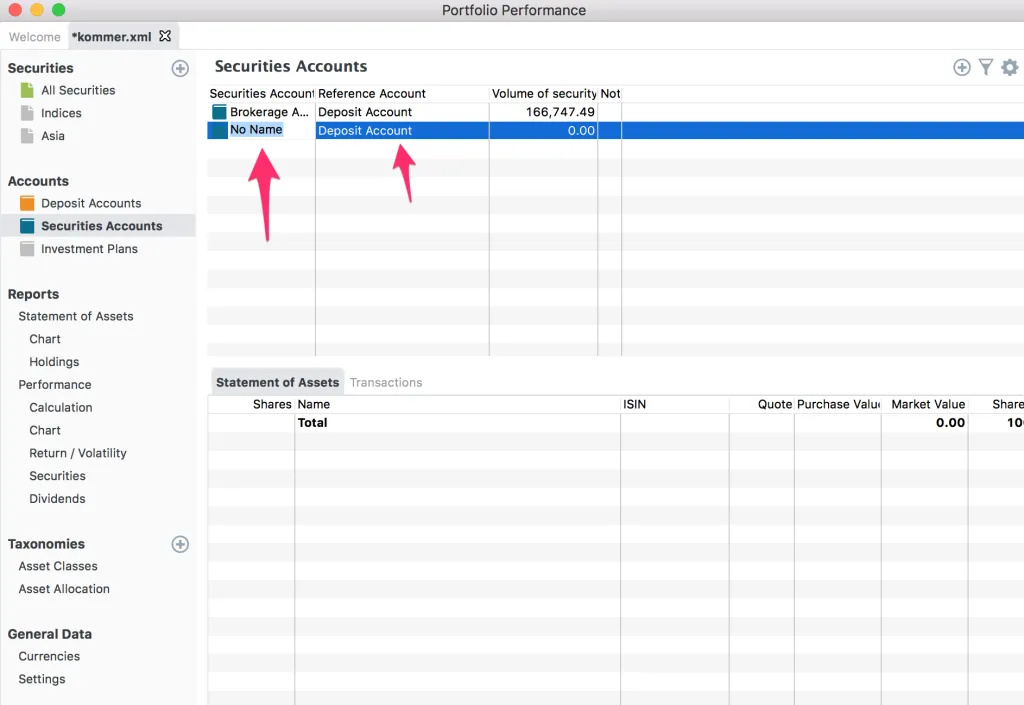
- Change the name of the new Account from “No Name” to your account name (e.g. DeGiro).
- Change the associated “Reference Account” to the appropriate Deposit Account. Securities Accounts and Deposit Accounts are linked so that for example, dividends from a ETF are credited to the correct deposit account or purchases are debited from the deposit account.
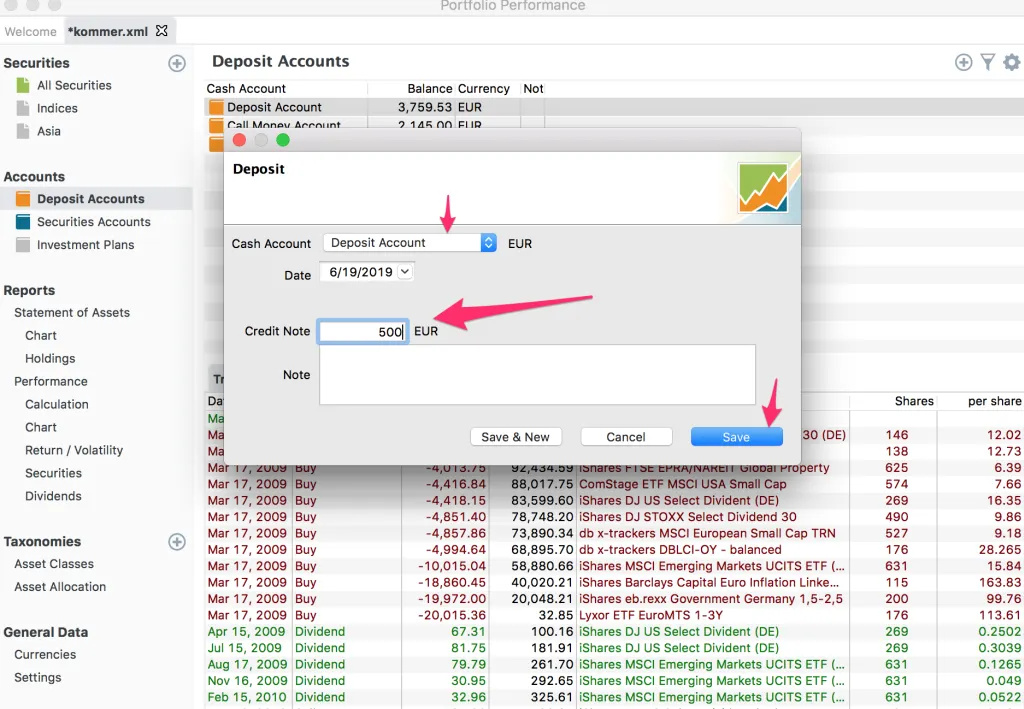
The purpose of the accounts is so that you can record your transactions. This is where you will spend the majority of our time. In the Deposit Accounts you can add “cash” related transactions like “Deposit”, “Withdrawal”, “Fees”, etc.

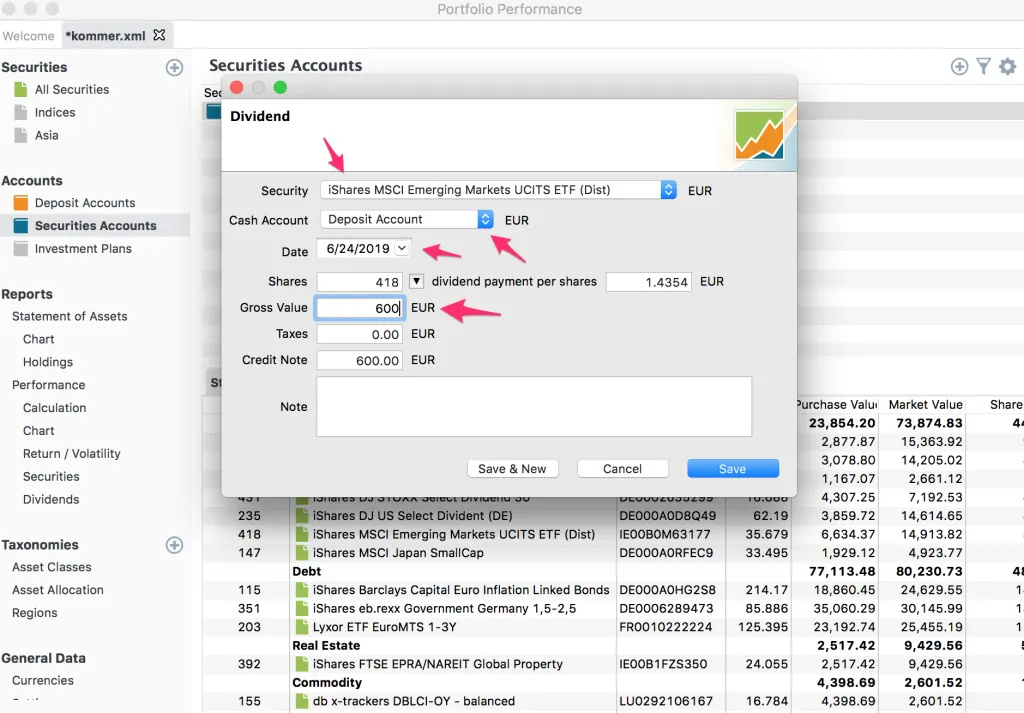
In the Securities Accounts you can add “ETF” related transactions like “Buy”, “Sell”, “Dividend”.
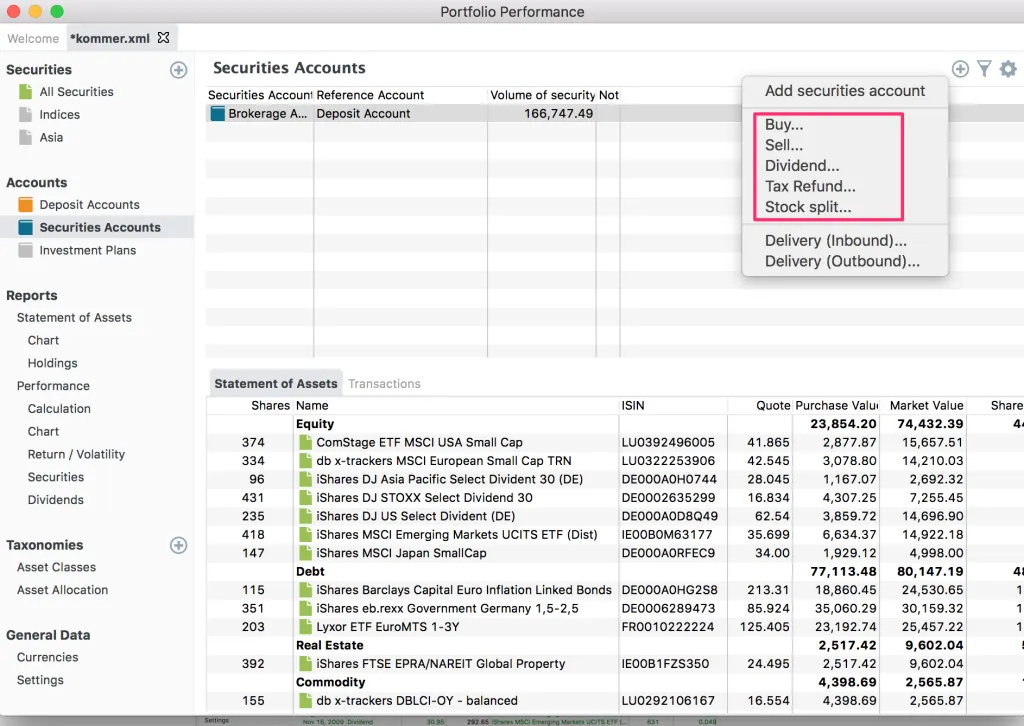
A typical workflow you will see is something along the lines of:
- Create a “Deposit” transaction in the Deposit Account
- Create a “Buy” transaction in the Securities Account

- Create a “Dividend” transaction in the Securities Account
Creating other types of transactions is as easy as the example transactions shown above.
Reports
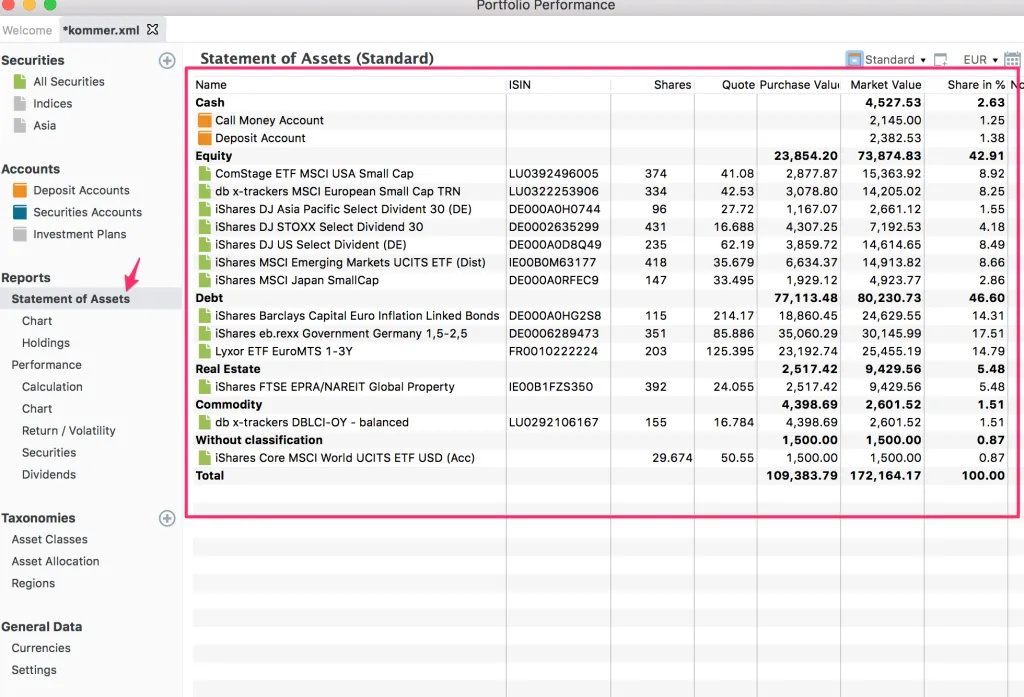
In the reports section is where you will find charts and metrics of your portfolio.
The “Statement of Assets” subsection has a global overview of the market value of all your open positions.
The “Holdings” subsection shows your portfolio in a pie chart.

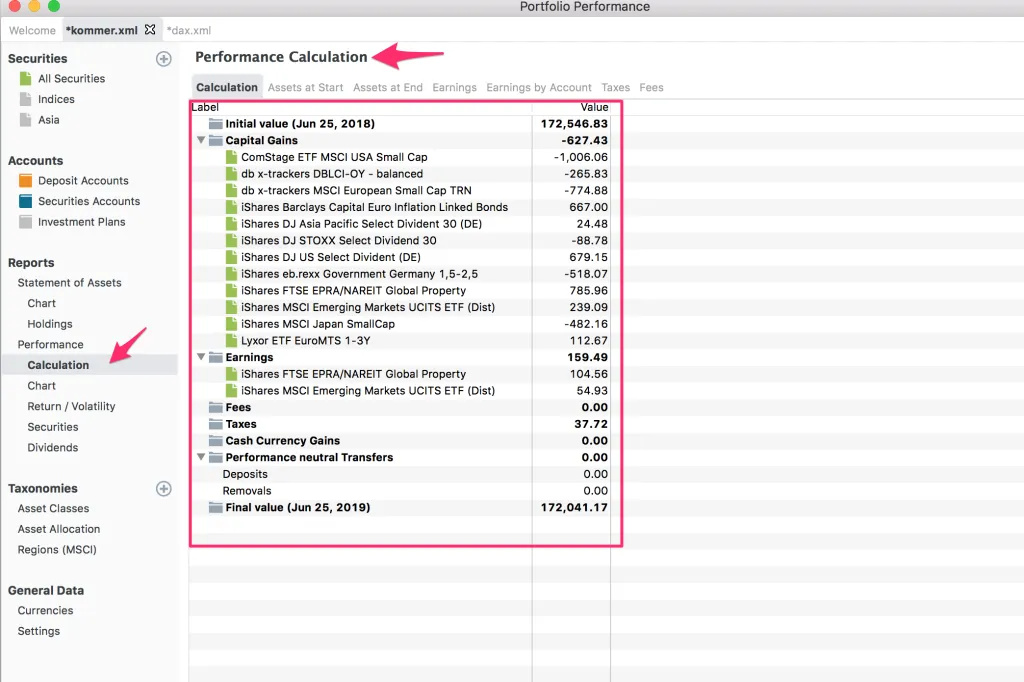
The “Performance” subsection has key indicators for your portfolio like volatility, internal rate of return, drawdown.
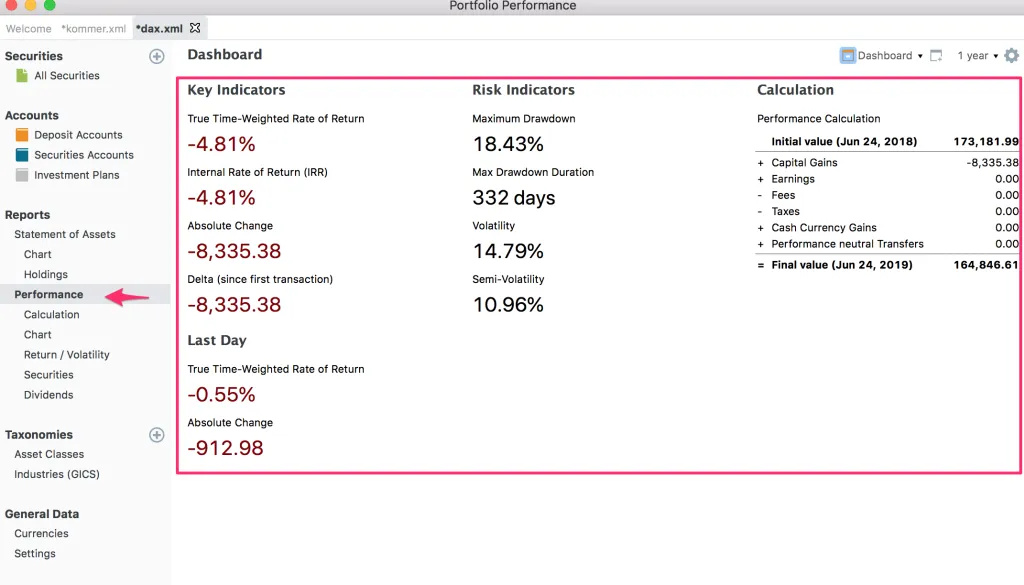
The tabs under the “Performance” subsection – Calculation, Chart, Return/Volatility, Securities, Dividends – allow you to dive into more specific details of your portfolio’s performance. In those tabs you can answer questions like:
- what is the total amount of capital gains?
- what is the total amount of dividends?
- how much have I spent in taxes?
- how has the portfolio grown over time?
- how is the performance breakdown per ETF?
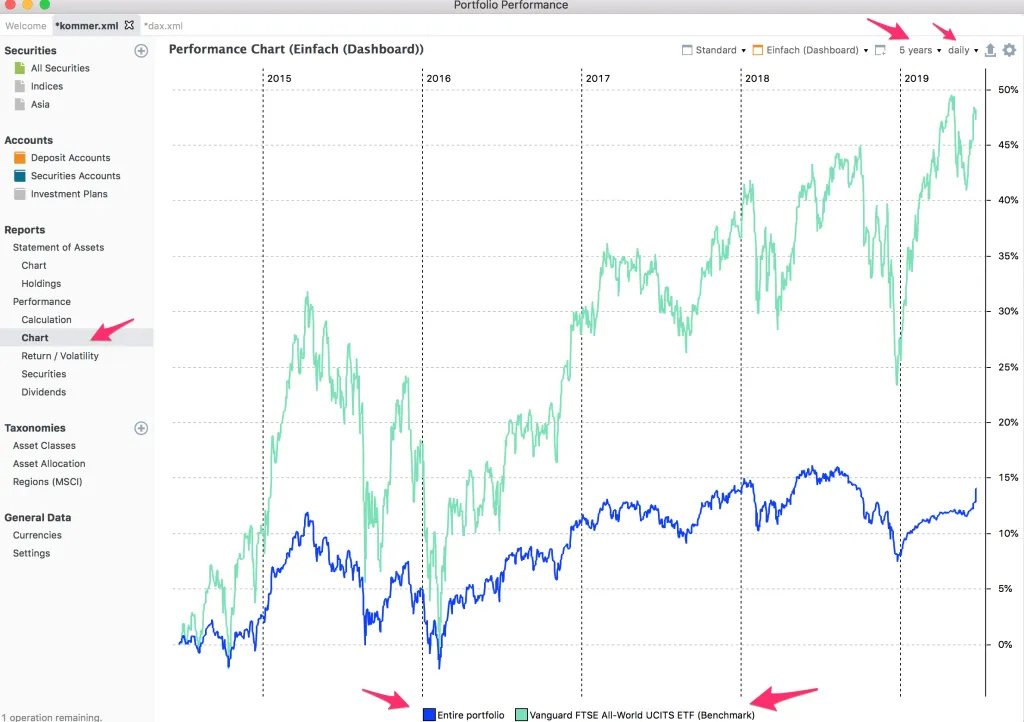
The “Chart” tab of the “Performance” subsection allows you to compare your portfolio against a benchmark. A benchmark can be any ETF you add to the “Securities” section.
To add a benchmark you have to click on the settings wheel and then click on “Add benchmark…”.
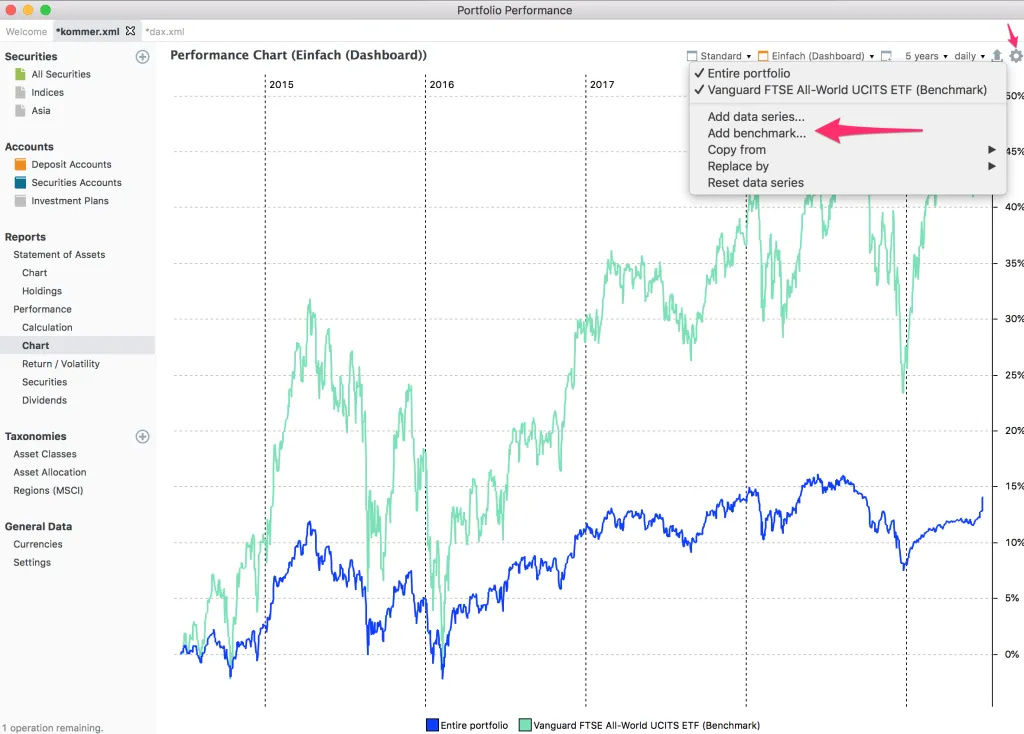
Then you can select a benchmark from one of the “securities” you added and press “Ok”.

You can remove a benchmark from the graph by clicking on the name of the benchmark from settings wheel.

Taxonomies
Taxonomies is how you categorize your ETFs. Categorizing ETFs allows you to see how much of each category you are exposed to.
You can have categories for “Asset Classes” like Equity, Cash, Debt, Real Estate, etc.

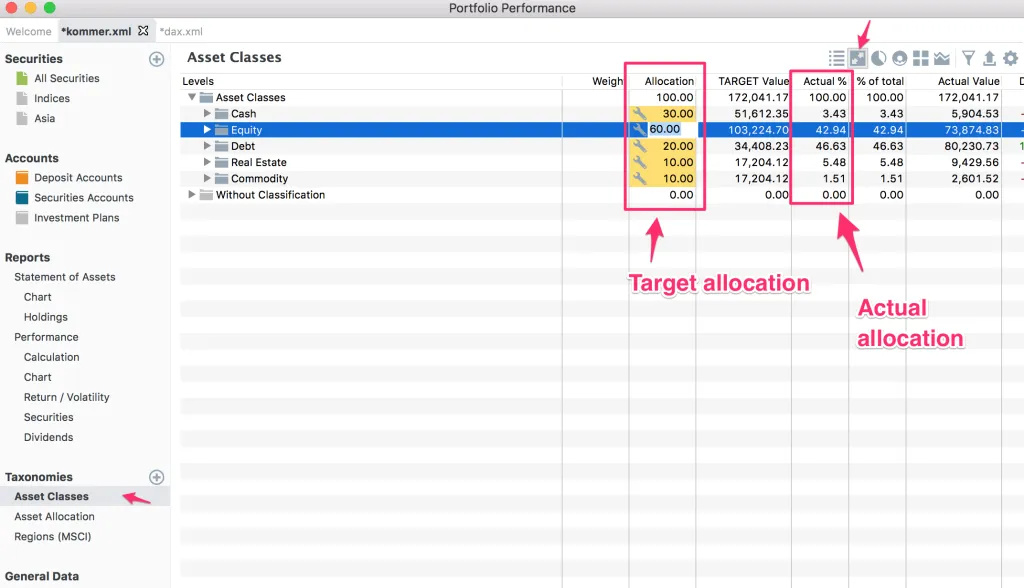
Categories can be used so you can analyze how well you are doing in regards to your target allocation. You can use the “rebalance” menu to set your target allocation and compare it to your “actual” allocation.
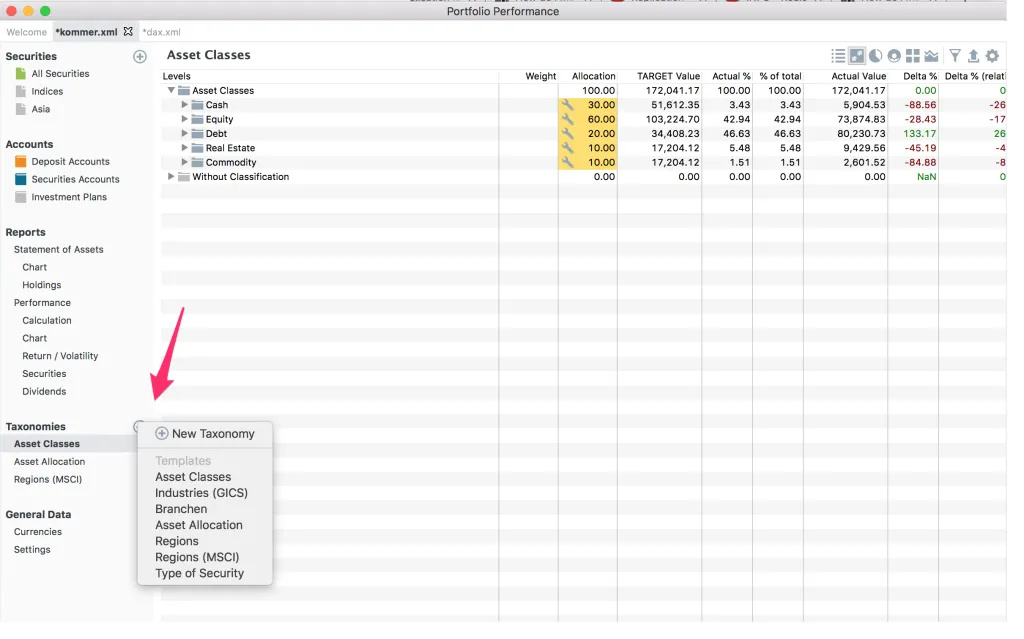
You can create new taxonomies by clicking on the “+” button. There are a few “template” taxonomies you can use or you can create something entirely new.
As I mentioned earlier in the “Securities” section, taxonomies are assigned to your ETF in the “edit” menu of a security.
General Data
In the “Currencies” subsection you can see the evolution of currency exchange rates between two currency pairs.
In the “Settings” subsection you can edit the data sources used for things like pulling historical prices.
I haven’t spent any time using the features of this section.
Exporting to CSV
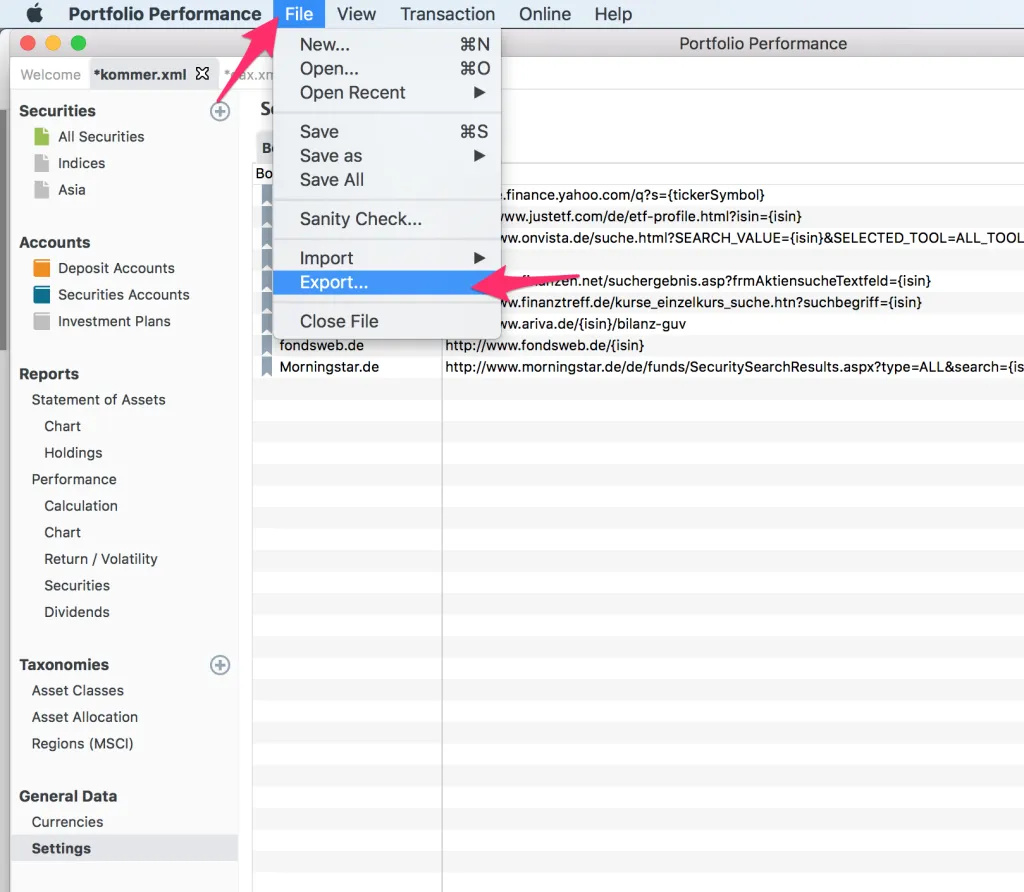
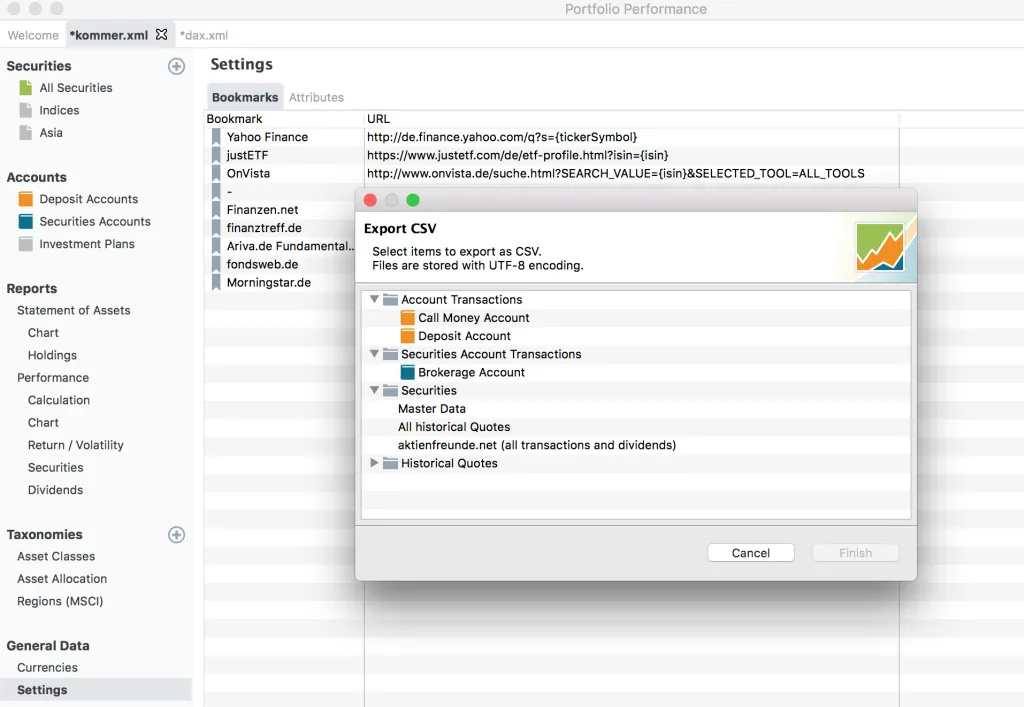
You can export data to CSV from the application’s menu bar “File > Export …”. There you can select which information you want to Export.
Many thanks to @indexfundinvestor.eu for creating the initial version of this tutorial. Please help keeping it up to date by editing it.